Adding a KVM Host to NSX-T Fabric
I’ve been a big fan of NSX, having been a user of it going back to 6.2. Naturally, I was very excited when NSX-T was announced and was very anxious to get it stood up in my lab. After procrastinating long enough, I finally got NSX-T setup and configured. One of the first things I wanted to do was setup my KVM hosts as Transport Nodes. In this guide I will walk through how to add a KVM Host to an NSX-T Fabric. The guide has the following assumptions:
- NSX-T deployed and configured
- CentOS 7.x guest operating system
- KVM installed (see here)
- Dedicated uplink(s) for NSX
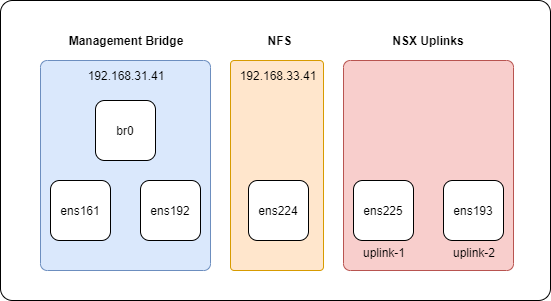
You will need at least one virtual NIC dedicated for the NSX bridge. I opted for two, in an Active/Standby configuration. Here is the network configuration of my CentOS virtual machine:
NSX-T Configuration
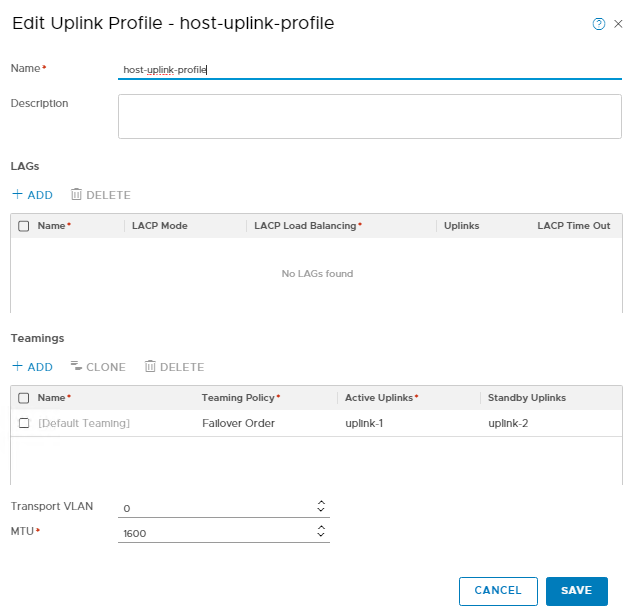
Interfaces ens225, and ens193 are going to be used for my NSX VTEP uplinks. Because these are in an Active/Standby configuration, I can leverage my existing Uplink Profile:
I will also be using my existing TEP IP Pool:

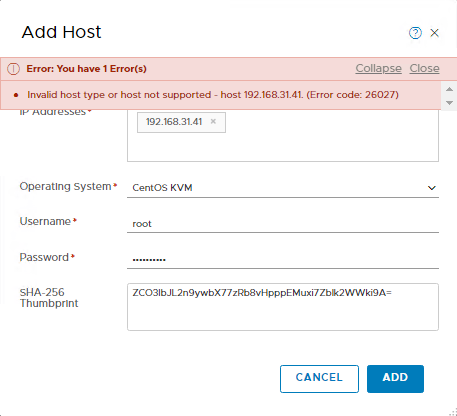
And with that we are ready to add our CentOS KVM server to our NSX-T Fabric! Begin by going to Fabric > Nodes > Hosts. Select “Standalone Hosts” under Managed by, and select “+ADD”. Input your host information, and select “ADD”.

Select “ADD” to accept the “Invalid Thumbprint” message.

Nice, so now we sit back and wait for the NSX Manager to push out the installation files to your server…. Wait! The installation has failed with the following error:
Professor Google pointed me to this article, which was for ESXi and not KVM. Unfortunately, there was not too much more out there on this error that I could find.
Manual
At this point we’re going to move to a manual installation. The first step is to download the appropriate NSX kernel modules for CentOS. These can be obtained from the VMware Downloads page.
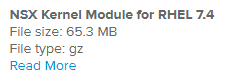
I’ve copied the .gz to a /tmp/nsx directory on my CentOS server, and then untarred the files.
sudo tar -xvf nsx-lcp-2.3.0.0.0.10085378-rhel74_x86_x64.tar
Navigate to the installation directory, and then perform the install with the following command:
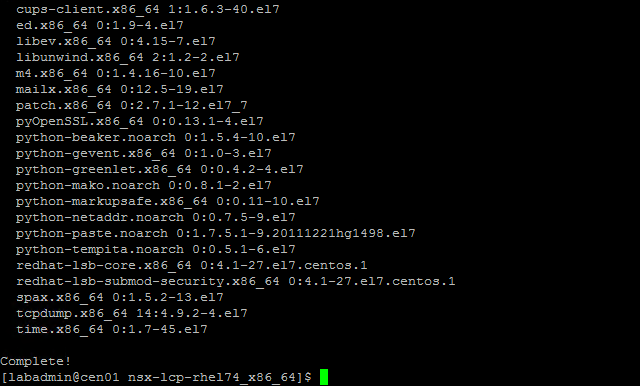
sudo yum install *.rpm
Assuming everything goes well, we get a nice “Complete!” message:
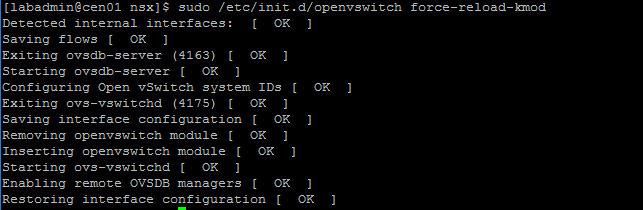
Next, reload the OVS kernel module:
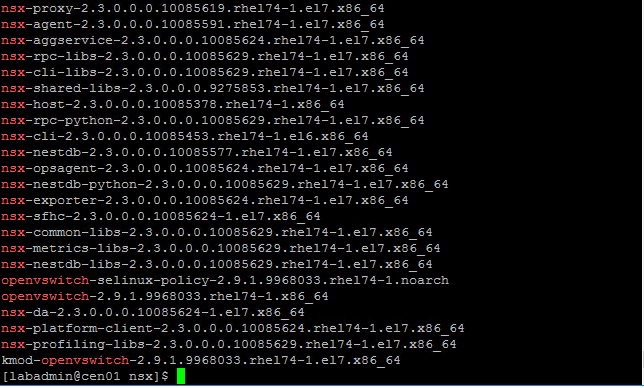
And validate that the NSX-T components have been successfully installed with the following command:
rpm -qa | egrep 'nsx|openvswitch|nicira'
Next we are going to join our newely prepared host to our NSX-T Fabric. Log into the NSX Manager via SSH, and issue the following command:
get certificate api thumbprint
Enter the NSX-CLI with the following command:
sudo nsxcli
Join the node to the management plane. The syntax is, “join management-plane [NSX Manager] username [admin username] thumbprint [NSX Manager thumbprint]”.

Enter the admin password, and assuming all goes well you will receive a “Node successfully registered as Fabric Node” message. Go back to the NSX Manager UI, refresh the Hosts page, and Boom! There is our CentOS 7 KVM server:

Let’s setup our Transport Node. Select our newly added node and go to Actions > Configure as Transport Node:
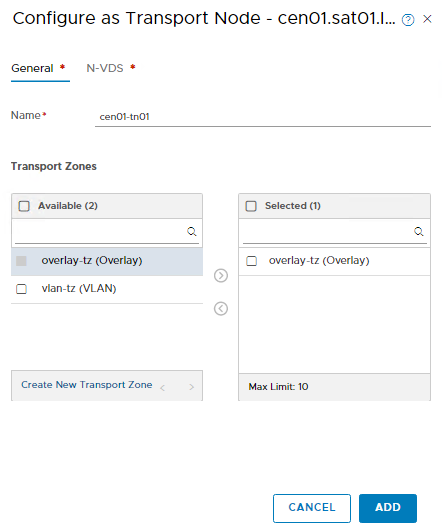
I select my Overaly Transport Zone, and then click “N-VDS” to setup my N-VDS:

I’m using my “host-uplink-profile” and “tep-pool” as mentioned earlier. For the Physical NIC’s I’m using my NSX Uplinks ens225, and ens193.
Click “ADD”, and wait a few minutes for the configuration to complete. Once it’s ready, you should have a green “Up” for Status:

Nice! Let’s check out the network configuration on our CentOS server. With an “ifconfig” command, we’ll see that there are two new network interfaces added to the server:
hyperbus: flags=4163<UP,BROADCAST,RUNNING,MULTICAST>  mtu 1500
        inet6 fe80::d076:ddff:fee9:d318  prefixlen 64  scopeid 0x20<link>
        ether d2:76:dd:e9:d3:18  txqueuelen 1000  (Ethernet)
        RX packets 8  bytes 656 (656.0 B)
        RX errors 0  dropped 0  overruns 0  frame 0
        TX packets 8  bytes 656 (656.0 B)
        TX errors 0  dropped 0 overruns 0  carrier 0  collisions 0

nsx-vtep0.0: flags=4163<UP,BROADCAST,RUNNING,MULTICAST>  mtu 1600
        inet 192.168.36.55  netmask 255.255.255.0  broadcast 192.168.36.255
        inet6 fe80::f8ac:c5ff:fe65:1925  prefixlen 64  scopeid 0x20<link>
        ether fa:ac:c5:65:19:25  txqueuelen 1000  (Ethernet)
        RX packets 68  bytes 7050 (6.8 KiB)
        RX errors 0  dropped 0  overruns 0  frame 0
        TX packets 14  bytes 908 (908.0 B)
        TX errors 0  dropped 0 overruns 0  carrier 0  collisions 0
The “hyperbus” is a vmkernel interface to be used for containers. The “nsx-vtep0.0” is the new bridge interface configured for NSX-T.
And let’s check out the OVS:
[labadmin@cen01 nsx]$ sudo ovs-vsctl show
cd9ecb39-3765-4f81-9645-0dfd971c1a65
    Manager "unix:/var/run/vmware/nsx-agent/nsxagent_ovsdb.sock"
        is_connected: true
    Bridge "nsx-switch.0"
        Controller "unix:/var/run/vmware/nsx-agent/nsxagent_vswitchd.sock"
            is_connected: true
        fail_mode: standalone
        Port "nsx-uplink.0"
            Interface "ens193"
            Interface "ens225"
        Port "nsx-switch.0"
            Interface "nsx-switch.0"
                type: internal
        Port "nsx-vtep0.0"
            tag: 0
            Interface "nsx-vtep0.0"
                type: internal
    Bridge nsx-managed
        Controller "unix:/var/run/vmware/nsx-agent/nsxagent_vswitchd.sock"
            is_connected: true
        fail_mode: secure
        Port hyperbus
            Interface hyperbus
        Port nsx-managed
            Interface nsx-managed
                type: internal
    ovs_version: "2.9.1.9968033.rhel74"
Here we can validate our N-VDS installation, named “nsx-switch.0” in KVM.
And let’s perform some connectivity checks to other VTEP interfaces in the environment. Here is a ping between my CentOS server to an ESXi 6.7 server over the VTEP interface:
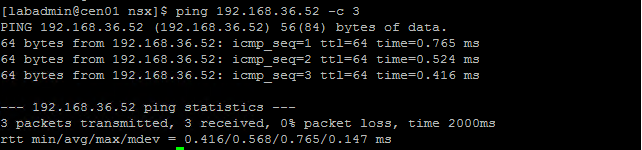
Looks good! I now have NSX-T installed and configured on my CentOS 7 server!