Implement and administer Prism Self-Service
The Prism Self Service feature allows you to create projects where consumers of IT infrastructure within an enterprise—individual users or teams such as development, test, and DevOps—can provision and manage VMs in a self-service manner, without having to engage IT in day-to-day operations.
Prism Self Service Overview
- Allows end-users to consume infrastructure resources in a self-service manner
- Previously hosted on a cluster through Prism
Element
- Now implemented through Prism Central
- Clusters registered to Prism Central 5.5 or later must be running AOS 5.5 or later to take advantage of the user self-service features
- Prism Central lets you create and manage VMs and
other virtual infrastructure objects
- These objects can be configured into a Prism Self Service (PSS) that individual users or teams can use to provision and manage virtual machines without having to engage IT in day-to-day operations
- While Prism Central enables infrastructure management across clusters, PSS allows end-users to consume that infrastructure in an independent self-service manner
The Prism Self Service feature represents a special view within Prism Central. While Prism Central enables infrastructure management across clusters, Prism Self Service allows end-users to consume that infrastructure in a self-service manner. Prism Self Service uses the resources provided by a single AHV cluster. (Other hypervisors are not supported platforms for Prism Self Service.)
- Prism Central administrator. The Prism Central administrator enables Prism Self Service and creates one or more self-service administrators. Prism Central administrators also create VMs, images, and network configurations that may be consumed by self-service users.
- Self-service administrator. The self-service administrator performs the following tasks:
- Creates a project for each team that needs self-service and adds Active Directory users and groups to the projects.
- Configures roles for project members.
- Publishes VM templates and images to the catalog.
- Monitors resource usage by various projects and its VMs and members, and then adjusts resource quotas as necessary.
- A Prism Central administrator can also perform any of these tasks, but they are normally delegated to a self-service administrator.
- Project user. These are the users assigned to a project by a self-service administrator. They can perform any action that the self-service administrator grants them. The permissions are determined by the roles assigned to the users and groups in the project. When project users log in, they see a custom self-service GUI interface that shows only what the role permissions allow. Project users create and manage only what they need.
Configuring Prism Self Service
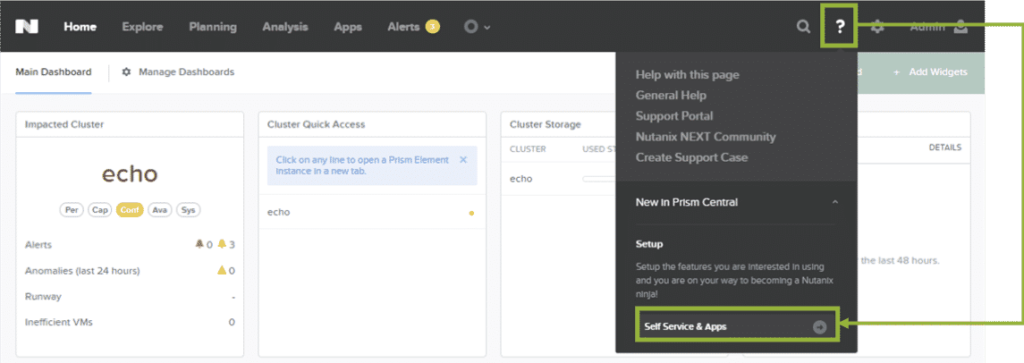
- Click the question mark icon in the main menu (see Main Menu Options) and select Self Service & Apps from the pull-down list.
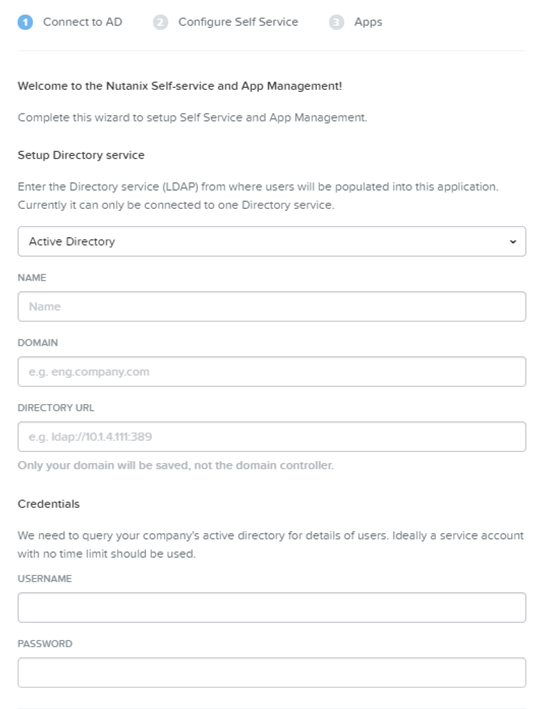
- In the Connnect to AD tab of the Self Service & App Setup page, do the following in the indicated fields:
- Click the New Directory button.
- This displays a Setup Directory service section with the following fields.
- Select Active Directory as the directory service.
- Name: Enter a directory name.
- This is a name you choose to identify this entry; it need not be the name of an actual directory.
- Domain: Enter the domain name.
- Enter the domain name in DNS format, for example, nutanix.com.
- Directory URL: Enter the URL address to the directory.
- The URL format is as follows for an LDAP entry (the only type supported currently): ldap://host:ldap_port_num. The host value is either the IP address or fully qualified domain name. The default LDAP port number is 389. Nutanix also supports LDAPS (port 636) and LDAP/S Global Catalog (ports 3268 and 3269). The following are example configurations appropriate for each port option:
- Note: LDAPS support does not require custom certificates or certificate trust import.
- Port 389 (LDAP). Use this port number (in the following URL form) when the configuration is single domain, single forest, and not using SSL.
- ldap://ad_server.mycompany.com:389
- Port 636 (LDAPS). Use this port number (in the following URL form) when the configuration is single domain, single forest, and using SSL. This requires all Active Directory Domain Controllers have properly installed SSL certificates.
- ldaps://ad_server.mycompany.com:636
- Port 3268 (LDAP – GC). Use this port number when the configuration is multiple domain, single forest, and not using SSL.
- Port 3269 (LDAPS – GC). Use this port number when the configuration is multiple domain, single forest, and using SSL.
- Note: When constructing your LDAP/S URL to use a Global Catalog server, ensure that the Domain Control IP address or name being used is a global catalog server within the domain being configured. If not, queries over 3268/3269 may fail.
- Username (Credentials section): Enter the user name for the Active Directory administrator account.
- Password (Credentials section): Enter the password for the Active Directory administrator account.
- Click the Next button.
- Click the New Directory button.
- In the Configure Self Service tab, do the following in the indicated fields:
- Click the Add Admins button.
- This displays a line to specify a self-service administrator. In the Name field, enter an individual or group name (in the directory service) that you want to give self-service administrator privileges and then click Save in the Actions field. To add additional self-service administrators, click the Add Admins link and repeat this process.
- In the Default Cluster field, select the target cluster from the pull-down list.
- In the Networks field, check the box(es) for the network(s) on which Prism Self Service can run. If you select multiple networks, specify (click the star for) the default network.
- Click the Next button

- In the Enable App Management tab, do the following in the indicated fields:
- Note: Enabling applications management now is optional. If you do not enable it now, you can do it at a later date (see Applications Management).
- Check the Enable App Management box to enable application management.
- Check the Enable Nutanix seeded blueprints box to load your application store with a set of pre-defined blueprints.
- While loading the pre-defined blueprints is optional, it is recommended as it provides blueprints for many common use cases.
- Note: Enabling applications management now is optional. If you do not enable it now, you can do it at a later date (see Applications Management).
- Click the Save button.
Modifying Prism Self Service
- In the gear icon pull-down list of the main menu (see Main Menu Options), select Self-Service Admin Management.
- The Self-Service Admin Management window appears.
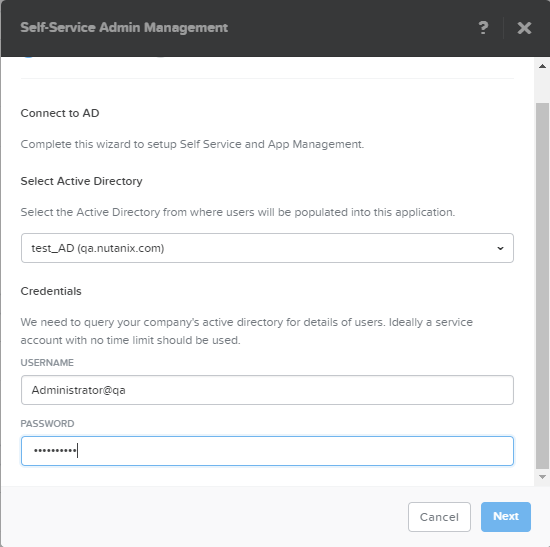
- To change an Active Directory setting, do the following in the Connect to AD tab:
- Select the desired Active Directory from the pull-down list.
- Enter the user name and password of an Active Directory user with administrator permissions.
- Note: To prevent future access problems, it is recommended that you use an administrator account with no time limit.
- Click the Next button.
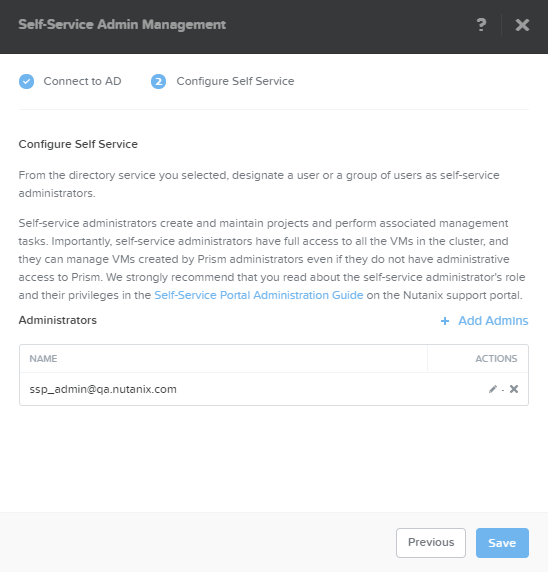
- To change the self-service administrator settings, do one or more of the following in the Configure Self Service tab and then click the Save button.
- To add an administrator, click the click the Add Admins link, which opens a new line. In the Name field, enter an individual or group name (in the directory service) that you want to give self-service administrator privileges and then click Save in the Actions field.
- To change an existing self-service administrator, click the pencil icon in the Actions field for that user, update the user name in the Name field, and then click Save in the Actions field.
- To remove an existing self-service administrator, click the X icon in the Actions fields for that user.

Migrating Prism Self Service
After configuring the Prism Self Service initially, you can modify the Active Directory or self-service administrator settings at any time. To change any of these self-service parameters, do the following:
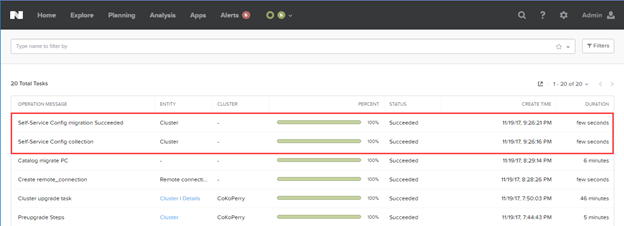
- Select Migrate SSP from the task (gear icon) pull-down list in the main menu.
- Select the cluster that hosts the Prism Self Service instance to migrate from the pull-down list.
- If there is only one cluster with a Prism Self Service instance to migrate, that cluster is selected automatically (no pull-down list). If no cluster is found that has a Prism Self Service instance to migrate, a message to that effect appears.
- Enter the credentials (username and password) for an Active Directory user with administrator permissions.
- Click the Migrate button.
- This starts the migration process. Click the Close button to close the window. You can view progress of the migration through the Tasks dashboard.
Project Management
A project defines a set of Active Directory with a common set of requirements or a common function, such as a team of engineers collaborating on an engineering project. The project also specifies the roles to associate with its members, networks that they can use, and (optionally) usage limits on infrastructure resources. Projects are 1:1 with a cluster.
Creating a Project
To create a project, do the following:
- In the Explore tab, select the Projects entity (see Projects Summary View).
- Click the Create Project button.
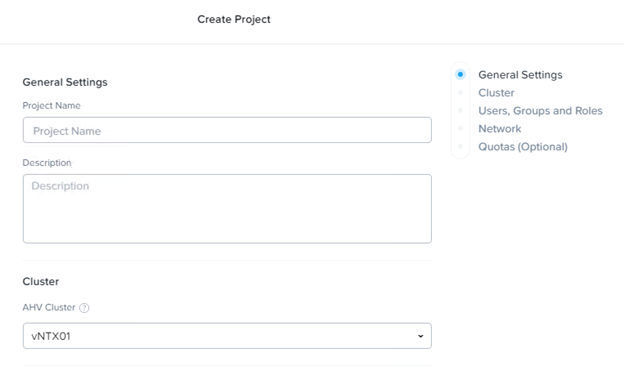
- The Create Project page appears.
- Do the following in the indicated fields:
- Project Name: Enter a name for the new project.
- Description (optional): Enter a description of the project.
- Cluster: Select the target cluster from the pull-down list.
- Note: Only clusters running AHV appear in the list.
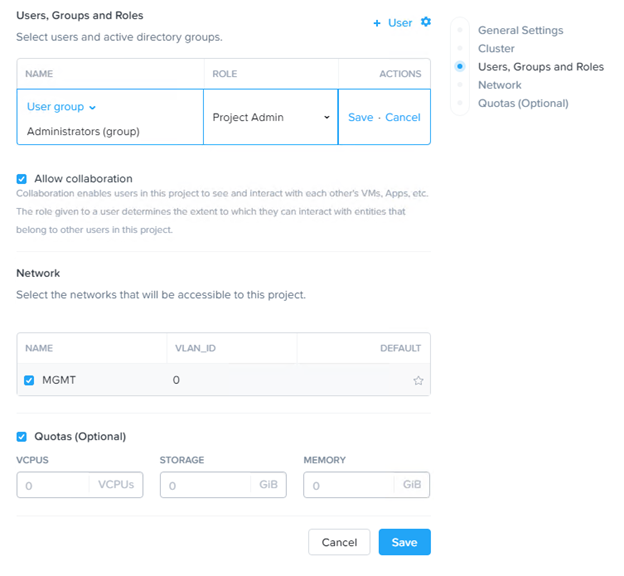
- Users, Groups and Roles: Click the + Users link to open a blank row in the table. Enter the Active Directory name of a user or group (typically in the form name@domain) in the Name field, select the role for that user from the pull-down list in the Role field, and then click Save in the Actions field.
- Repeat this step for each user or group that you want to add. You can assign one of the predefined roles (see Built-in Role Management) or a custom role that you previously created (see Custom Role Management). Nested groups (groups within a group) are not supported, that is if a selected group includes a group name (instead an individual name) within that group, the group name is not expanded so those group members are not included in the project.
- Note: Local users are not supported in a project. You can only add users from your configured directory service.
- Allow collaboration: Check the box to allow any group member to see the VMs, applications, and other objects created by other members of the group. If this box is not checked, group members can see only the objects they create. The role assigned a group member determines the permissions that user has on objects created by other group members.
- Network: Select (check the Name field box for) the usable network(s) and select (check the Default field star icon for) the default network for the project.
- Quotas (optional): Check the box to specify usage limits for compute, storage, and memory in the displayed vCPUs, Storage, and Memory fields.
- A quota specifies a usage limit on an infrastructure resource (compute, memory, or storage) for the project. Project members cannot use more than the specified limit. A quota does not guarantee the project a certain amount of infrastructure resources. Instead, it ensures that a single project or a small number of projects do not overrun the infrastructure. If the Nutanix cluster runs out of a resource, project members might not be able to use the resource even if the project has not reached its specified limit. However, if a project requires more resources, you can increase its quota.
- If you do not specify a quota, no usage limit is applied. However, usage statistics are collected even if you do not specify a quota.
- Click the Save button (lower right) to add the project. The page closes and the new project appears in the Projects view list.
Modifying a Project
- In the Explore tab, select the Projects entity.
- Select (check the box for) the target project.
- Do one of the following:
- To modify that project, select Update Project from the Actions pull-down menu. The Edit Project page appears, which includes the same fields as the Create Project page (see Creating a Project). Update the field values as desired and then click the Save button.
- To delete that project, select Delete from the Actions pull-down menu. You are prompted to verify the delete (click the OK button). The project is then deleted and removed from the list.
Creating a Custom Role
Perform the following procedure to create a role.
- In the Explore tab, select the entity Roles.
- Click Create Role.
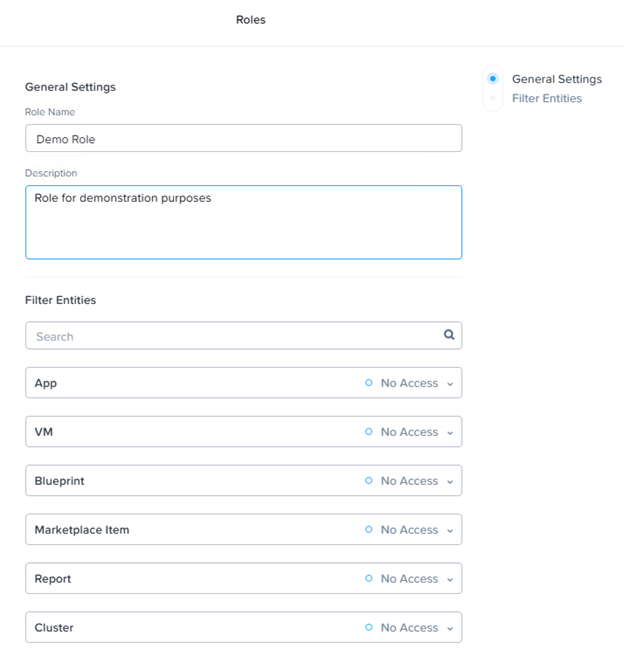
- In the Create Role page, do the following in the indicated fields:
- Role Name: Enter a name for the new role.
- Description (optional): Enter a description of the role.
- VM Permissions: Click the enable button for any VM actions (delete, update, create, or console) you want to enable for that role.
- Blueprint Permissions: Click the enable button for any blueprint permissions that you want to allow (create, update, delete, and so on).
- App Permissions: Click the enable buttons for any app permissions that you want to allow (view, create, update, or delete).
- Marketplace Item Permissions: Click the enable buttons for any marketplace item permissions that you want to allow (view or create).
- Click Save to add the role. The page closes and the new role appears in the Roles view list.


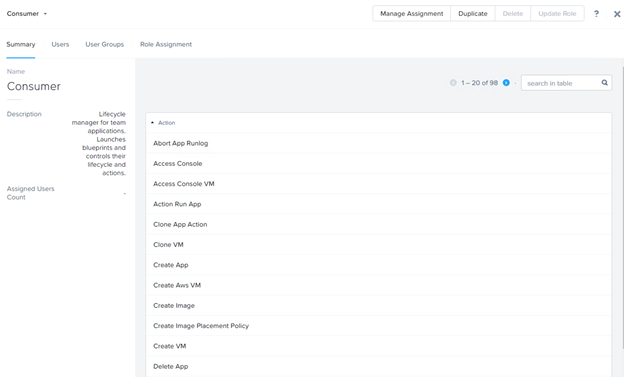
Displaying Permissions of a Role
- In the Explore tab, select the entity Roles, and click a role.
- For example, if you click the Consumer role, you can view all the privileges associated with the Consumer role.
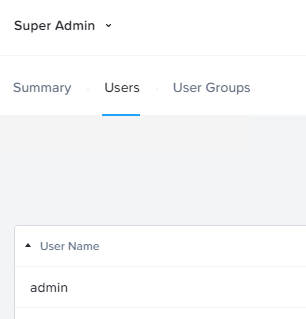
- Click the Users tab to display all the users that are assigned that role.
Category Management
A category is a grouping of entities into a key value pair. Typically, new entities are assigned to a category based on some criteria. Policies can then be tied to those entities that are assigned (grouped by) a specific category value.
For example, you might have a Department category that includes values such as engineering, finance, and HR. In this case you could create one backup policy that applies to engineering and HR and a separate (more stringent) backup policy that applies to just finance. Categories allow you to implement a variety of policies across entity groups, and Prism Central allows you to quickly view any established relationships.
The following hypothetical example illustrates the relationship of four policies (Backupbasic, Engenvironment, Hourly alerts, and Daily backup) tied to three departments (Eng, Fin, and HR) that apply to 30+ VMs in each department.

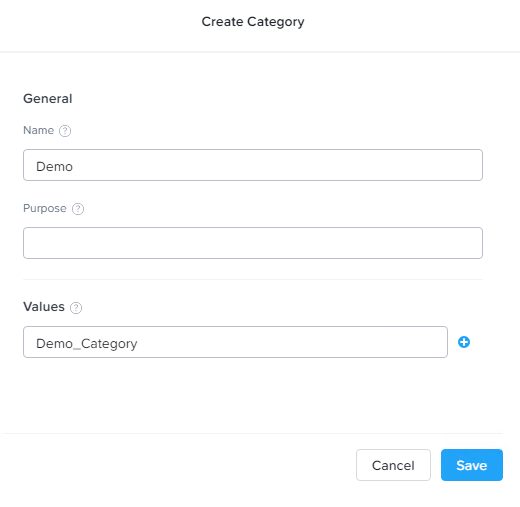
Creating a Category
- In the Explore tab, select the Categories entity.
- Click the Create Category button.
- The Create Category page appears.
- Do the following in the indicated fields:
- Name: Enter a name for the new category.
- Note: The Name and Values fields are case sensitive.
- Purpose (optional): Enter a description of the category purpose.
- Values: Enter a category value. To add a second (and subsequent) value, click the plus sign (+) to the right. This opens another line; enter the next value in the new field.
- Repeat this step for all the values you want to include in the category. For example, if the category name is Departments, values might include Engineering, HR, Sales, Marketing, and so on.
- Click the Save button.
- This creates the category and closes the page. The new category now appears in the category list.
- Name: Enter a name for the new category.
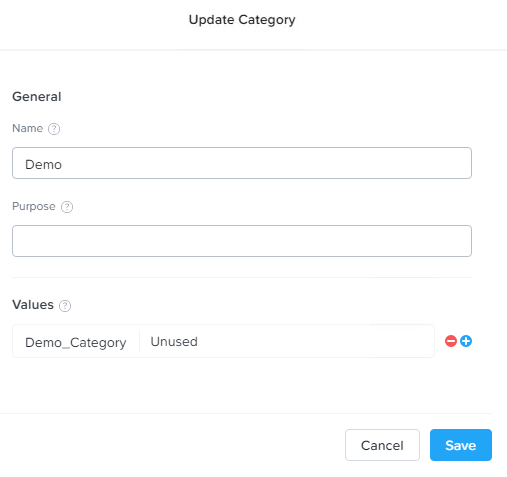
Modifying a Category
Note: System (built-in) categories cannot be modified or deleted.
- In the Explore tab, select the entity Categories (see Categories Summary View).
- Find the desired category in the list, and then select (check the box for) that category.
- Do one of the following:
- To modify that category, select Update from the Actions pull-down menu. The Update Category page appears, which includes the same fields as the Create Category page (see Creating a Category). Update the field values as desired and then click the Save button.
- To delete that category, select Delete from the Actions pull-down menu. You are prompted to verify the delete (click the OK button). The category is then deleted and removed from the list.
Assigning a Category
- In the Explore tab, select VMs from the entities list (see VMs Summary View).
- Find the target VMs in the list, and then select (check the box for) those VMs.
- Select all the VMs you want to tag with the same category value.
- Note: You will need to repeat this procedure for each group of VMs that you want to assign a different category value.
- Select Manage Categories from the Actions pull-down menu.
- This displays the Manage VMs Categories page.
- In the Manage VMs Categories page, do the following:
- Enter a category name in the Set Categories field, select the target value from the list, and then click the plus sign (+) to the right of the field to assign that category value to the VM(s).
- The Set Categories field acts like a search field; it provides a list of matching categories as you enter a string. Select the desired category value when you see it in the list. Any policies associated with the selected category value appear in the Associated Polices section to the right.
- Repeat the first step to assign a value for a second category.
- You can repeat this step for as many categories as desired. To illustrate, in the figure above the VMs are assigned two values, “AV” from the “Cluster” category and “Default” from the “Quarantine” category. In this example “Cluster:AV” has no policies associated with it currently, but “Quarantine:Default” is associated with the Quarantine security policy.
- Click the Save button (bottom right).
- This saves the category assignments and closes the page.
- Enter a category name in the Set Categories field, select the target value from the list, and then click the plus sign (+) to the right of the field to assign that category value to the VM(s).
